Which is best? Azure AppService or Azure Cloud Service?

After my previous post, we managed to find out what flavor of App Service to use (resumed at the top of the post by a famous tldr).

But other question I receive is often? Should I use a WebApp (read: AppService) or a Cloud Service? What’s the difference? Just like anything slightly complicated, the answer is “it depends”. I know! It’s a classic obscure response. The reason is that there is no silver bullet. If there is no silver bullet, it means we have to look at your current scenario and try to compare it with use cases that fits the solutions.

So let’s try to dive-in a bit on use cases that warrant a WebApp and on those that would suit a Cloud Service better.

What is an AppService?

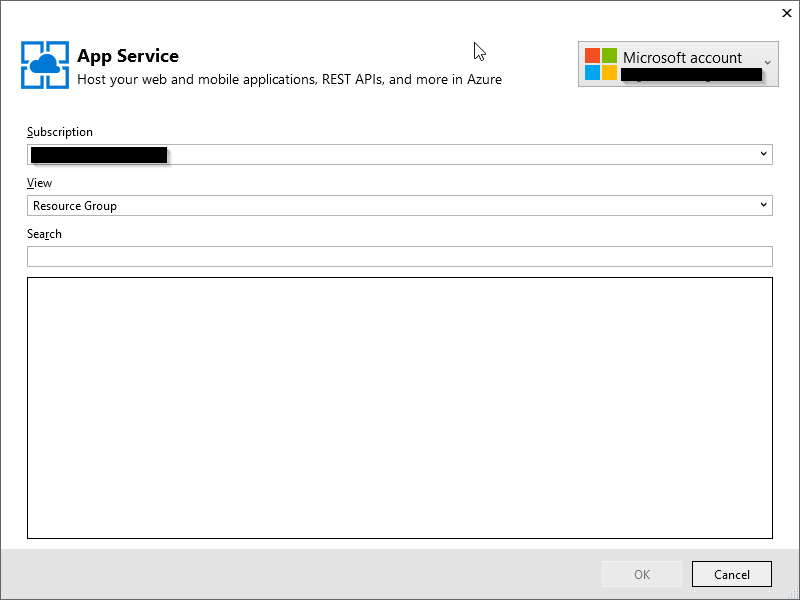
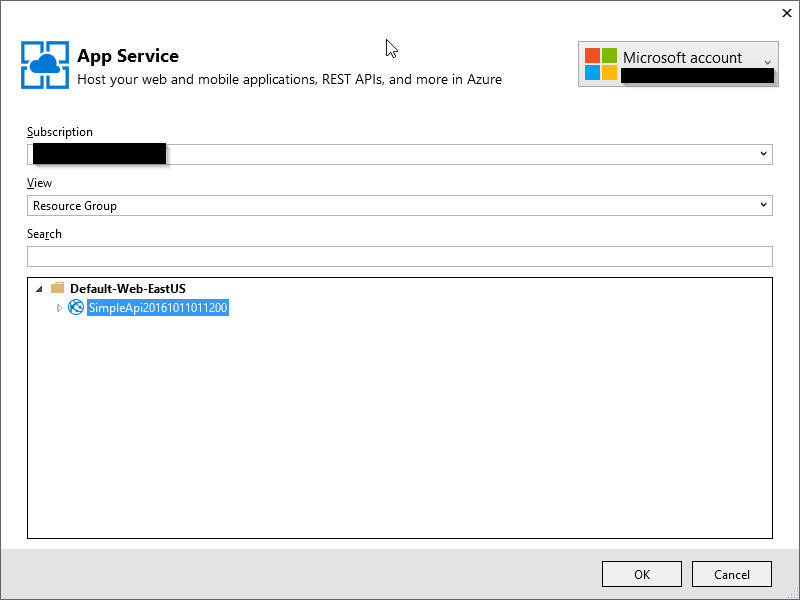
An AppService allows you to host a web application (API or UI) very easily within seconds.

If you are looking to iterate quickly, this is your option. Deployments take usually seconds from your machine. AppServices also allow you to quickly scale up (up to 10 instances) and out either by responding to metrics (CPU/Memory/Queue length) or manually through the portal. You can share resources by grouping your web applications within App Service Plans. Applications are hosted on the *.azurewebsites.net domain. Each additional instance that are created to answer to the demand contains a copy of your content and configuration of your application. No need to replicate anything. As we don’t always deploy in production, it’s possible to create a staging environment where you can release a preview build and test it out in the real production environment for vetting.

AppServices is PaaS so no need to handle Windows Updates or any kind of patching. If you don’t want to deploy with Visual Studio, you can do deployment with GitHub, Dropbox , FTP or Web Deploy.

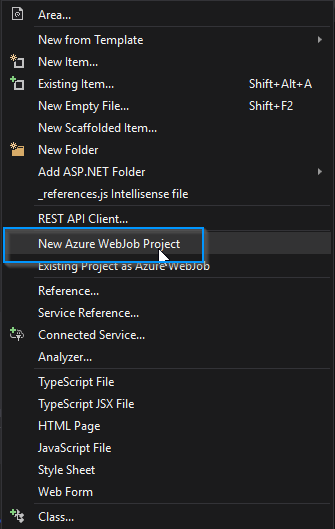
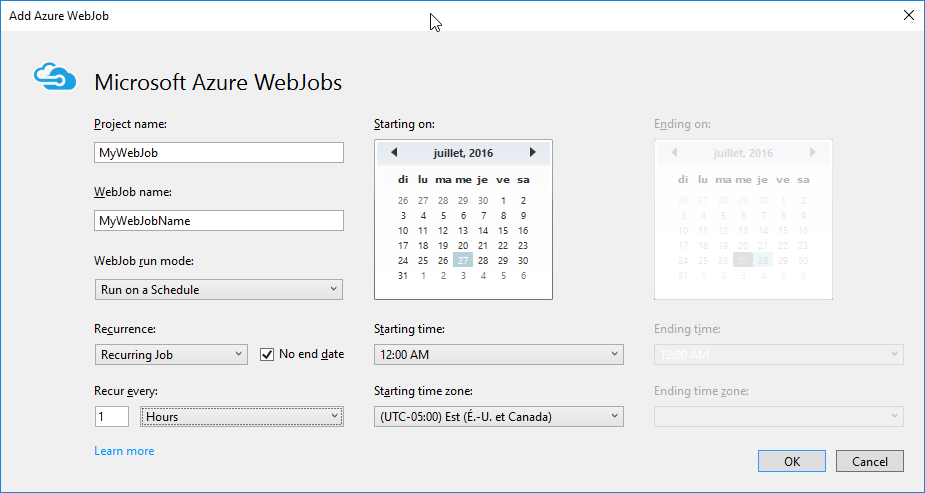
All applications requires to run some jobs on schedule or to answer to events from a queue. In those cases, WebJobs can be easily deployed and share the resources of the current web application.

Supports applications written in .NET, Node, PHP, Python, Java.

What is a Cloud Service?

A Cloud Service allows you to host anything on a compute resource running Windows that can scale to hundreds of machines.

If you are looking for an application that can take almost any type of traffic/load, this is your option. Deployment are longer. They will usually take a few minutes to deploy new releases. Just like AppServices, it does support multiple staging environment and allow you to scale up to tremendous amounts (up to 1000 instances) by responding to metrics (CPU/Memory/others) or just manually through the portal.

You can host 25 roles (Web/Worker) per service and independently scale them each to 1000 instances. If you want a rolling deployment instead of “all at once”, Cloud Service is where it shines. It can deploy to each instance gradually instead of all instances at once unlike AppServices.

Need to Remote Desktop into the Cloud Service to see what is going on? Totally possible.

Cloud Service is a PaaS service and will receive all OS patches automatically and, if configured properly, without any down time.

However, it does not do GitHub deployment, it will not automatically integrate APIs with Logic Apps or Biztalk Services.

When do I want to use an AppService?

When you want to…

  • Enjoy fast deployments from many sources
  • Creating web application that are not too resource hungry
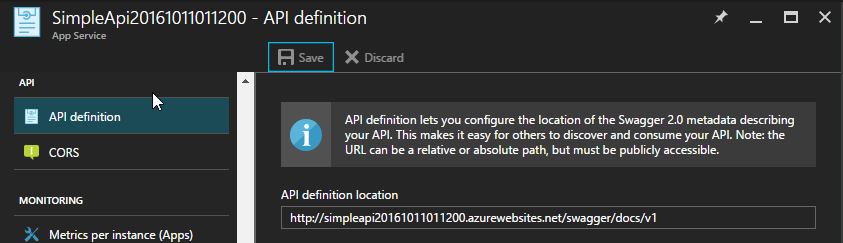
  • Creating APIs that need to integrate with Logic Apps
  • Create a minimum viable product
  • You are using .NET, Node, Python or Java
  • Run maintenance jobs
  • Limit your expenses and save money

Common scenarios are…

  • Hosting a blog
  • Hosting an e-commerce
  • Hosting a public company website
  • Creating any application for a client (Note: I always start with AppServices)
  • Run small jobs on a specific schedule or upon requests (with or without web hooks)
    • Polling data feeds
    • Cleaning up SQL databases
    • Send notifications

When do I want to use a Cloud Service?

When you want to…

  • Create powerful applications that can scale to massive numbers
  • Handle massive amount of traffic
  • Independently scale background processes from the front-end
  • Run non-trivial background task
  • Remote desktop onto the machine
  • High amount of control over the configuration
  • Ensure a proper separation between your instances/roles running your application (including security reasons)

Common scenarios are…

  • Running specific tasks that require Windows APIs that are not available in AppServices (GDI+, COM, etc.)
  • Hosting Fortune 500 e-Commerce
  • Running parallelizable CPU/memory intensive tasks
  • Running long running tasks
  • Running code with elevated privilege
  • Installing custom software on the VM (framework, compilers, others)
  • Was running on AppServices but exceeded the capabilities of the service
  • Moving some legacy applications from a home data center to the cloud

Conclusion

In the end, it’s all about what you need.

Most of the time, clients don’t need more than AppServices to start deploying applications and see what Azure can bring to the table. When the scenario requires it, it’s our job to orient the technological choice toward the right solution.

While AppServices may suffice for 80% of a customer’s need, the other 20% will have you dig your hands into Cloud Services or even Azure Batches (more on that later!).

I hope that I managed to help you make a decision today. If you have questions, do not hesitate to comment!

Azure WebApp vs Azure API App

tldr; No differences under the hood. Only different icons, name and an API Definition that is populated. All App Services features are still available to you.

If it’s your first time in the Azure ecosystem, you must be wondering what is the difference between a WebApp and an API app. Which one should I choose?

Differences between Azure WebApp and Azure API App

Most of the differences are pretty much in the naming, the icons, and the tooling.

Features of one are available in the others. There is absolutely no differences beside icons and names on the Azure Portal. Your initial choice doesn’t impact you as much as it once did.

Let’s take a sample web app (created as an Azure WebApp) that is in my Azure Subscription. Here’s what is displayed once I get in the menu.

Mobile and Api menu

Both Api and Mobile options are available. Where’s the other differences? Mainly in the tooling. Some elements of the tooling is only going to work if you have an API definition (see above) but having an API Definition is not exclusive to an API App.

The API Definition is a link to your Swagger 2.0 API description. When publishing an API Service from Visual Studio, this field is going to be set automatically but can be pretty much anything you want.

Once you have an API defined, multiple other scenarios opens up like exposing your APIs through logic apps or BizTalk services, using API Management, or generating an API client from Visual Studio. But at its core? It’s still an App Service.

Generating a Client from a WebApp API Definition

When I right click Add > REST Api Client... in a Console Application in Visual Studio 2015, I’m shown the following screen.

Add REST Client

Clicking Select Azure Asset... will bring you this window.

Select Azure Asset

As you can see, there’s no API present. What happens if I publish a web app and add the API Definition after?

Set API Definition

I’ll close the Azure Asset Selector and refresh it.

Select Azure Asset

Summary

There once was a disconnect between Azure WebApp and API App. Today? The only difference is which icon/name you want that app to be flagged with. Otherwise? All features available for one is available to the other.

So go ahead. Create an app. Whether it’s an API, a Website, or an hybrid doesn’t matter. You’ll get work done and deployed just as easily.

Creating .NET Core Console WebJobs on an ASP.NET Core Azure WebApp

Code tested on .NET Core RTM 1.0.1 with Tooling Preview2 and Azure SDK 2.9.5

Introduction

I love WebJobs. You deploy a website, you need a few tasks to be run on the side to ensure that everything is running smoothly or maybe un-queue some messages and do some actions.

How to do it in ASP.NET 4.6.2? Easy. Visual Studio is throwing you menus, wizards, blog posts and what not at you to help you start using it. The tooling is curated to make you fall into a pit of success.

With .NET Core tooling still being in preview, let’s just say that there’s no menus nor wizards to help you out. I haven’t seen anything online that help you automate the “Publish“ experience.

The basics - How do they even work?

WebJobs are easy. If you forget the Visual Studio tooling for a moment, WebJobs are run by Kudu.

Kudu is the engine behind most of Azure WebApps experience from deployments to WebJobs. So how does Kudu detect that you have WebJobs to run? Well, everything you need to know is on their wiki.

Basically, you will have a command file named run (with various supported extensions) located somewhere like this:
app_data/jobs/{Triggered|Continous}/{jobName}/run.{cmd|ps1|fsx|py|php|sh|js}

If that file is present? Bam. WebJob created with the jobName. It will automatically show in your Azure Portal.

Let’s take this run.cmd for example:

1
2
3
@echo off

echo "Hello Azure!"

Setting a schedule

The simplest way is to create a CRON schedule. This can be done by creating a settings.job file. This file is basically all the WebJobs options. One of them is called schedule.

If you want to trigger a job every hour, just copy/paste the following in your settings.job file.

1
2
3
{
"schedule": "0 0 * * * *"
}

What we should have right now

  1. One ASP.NET Core application project ready to publish
    • A run.cmd file and a settings.job file under /app_data/jobs/Triggered/MyWebJob
  2. One .NET Core Console Application

To make sure it runs, we need to ensure that we publish the app_data folder. So add/merge the following section to your project.json:

1
2
3
4
5
6
7
{
"publishOptions": {
"include": [
"app_data/jobs/**/*.*"
]
}
,

}

If you deploy this right now, your web job will run every hour and echo Hello Azure!.

Let’s make it useful.

Publishing a Console Application as a WebJobs

First let’s change run.cmd.

1
2
3
@echo off

MyWebJob.exe

Or if your application doesn’t specify a runtimes section in your project.json:

1
2
@echo off
dotnet MyWebJob.dll

The last part is where the fun begins. Since we are publishing the WebApp, those executable do not exist. We need to ensure that they are created.

There’s a section in your project.json that runs right after publishing the ASP.NET Core application.

Let’s publish our WebJob directly into the proper app_data folder.

1
2
3
4
5
6
7
{
"scripts": {
"postpublish": [
"dotnet publish ..\\MyWebJob\\ -o %publish:OutputPath%\\app_data\\jobs\\Triggered\\MyWebJob\\"
]
}

}

Final Result

Congratulation! You now have a .NET Core WebJob published in your ASP.NET Core application on Azure that runs every hour.

All those console application are of course runnable directly locally or through the Azure scheduled trigger.

If this post helped, let me know in the comments!

Ajax requests in a loop and other scoping problems with JavaScript

In the current code I’m working on, I had to iterate over an array and execute an Ajax request for each of these elements.

Then, I had to do an action on that element once the Ajax request resolved.

Let me show you what it looked like at first.

The code

1
2
3
4
5
6
7
8
9
10
function Sample() {
var products = [{name: "first product"}, {name: "second product"}, {name: "third product"}];

for(var i = 0; i < products.length; i++) {
var product = products[i];
$.get("https://api.github.com").then(function(){
console.log(product.name);
});
}
}

NOTE: I’m targeting a GitHub API for demo purposes only. Nothing to do with the actual project.

So nothing is especially bad. Nothing is flagged in JSHint and I’m expecting to have the product names displayed sequentially.

Expected output

1
first product
second product
third product

Commit and deploy, right? Well, no.

Here’s what I got instead.

Actual output

1
third product
third product
third product

What the hell is going here?

Explanation of the issue

First, everything has to do with scope. var are scoped to the closest function definition or the global scope depending on where the code is being executed. In our example, var is scoped to a function above the for loop.

Then, we have the fact that variables can be declared multiple times and only the last value is taken into account. So every time we loop, we redefine product to be the current instance of products[i].

By the time an Http request comes back, product has already been (re-)defined 3 times and it only takes into account the last value.

Here’s a quick timeline:

  1. Start loop
  2. Declare product and initialize with products[0]
  3. Start http request 1.
  4. Declare product and initialize with products[1]
  5. Start http request 2.
  6. Declare product and initialize with products[2]
  7. Start http request 3.
  8. Resolve HTTP Request 1
  9. Resolve HTTP Request 2
  10. Resolve HTTP Request 3

HTTP requests are asynchronous slow operations and will only resolve after the local code is finished executing. The side-effect is that our product has been redefined by the time the first request comes back.

Ouch. We need to fix that.

Fixing the issue the old way

If you are coding for the browser in 2016, you want to use closures. Basically, passing the current value in a function that is executed when defined. That function will return the appropriate function to execute. That solves your scope issue.

1
2
3
4
5
6
7
8
9
10
11
12
function Sample() {
var products = [{name: "first product"}, {name: "second product"}, {name: "third product"}];

for(var i = 0; i < products.length; i++) {
var product = products[i];
$.get("https://api.github.com").then(function(product){
return function(){
console.log(product.name);
}
}(product));
}
}

Fixing the issue the new way

If you are using a transpiler like BabelJS, you might want to use ES6 with let variable instead.

Their scoping is different and way more sane than their var equivalent.

You can see on BabelJS and TypeScript that the actual problem was resolved in a similar way.

1
2
3
4
5
6
7
8
9
10
function Sample() {
var products = [{name: "first product"}, {name: "second product"}, {name: "third product"}];

for(var i = 0; i < products.length; i++) {
let product = products[i];
$.get("https://api.github.com").then(function(){
console.log(product.name);
});
}
}

Time for me to use a transpiler?

I don’t know if, for me, it’s the straw that will break the camel’s back. I’m really starting to consider using a transpiler that will make our code more readable and less buggy.

This is definitely going on my TODO list.

What about you guys? Have you encountered bugs that would not have happened with a transpiler? Leave a comment!

Extracting your Toggl data to Azure Blob Storage

As a self-employed developer, I use multiple tools to enable me to easily do the boring job. One of those boring job is invoicing.

I normally invoice monthly and I use 2 tools for this. Toggl for time tracking and Excel to generate my invoice.

Yeah. I use Excel. It’s easy and it works. The downside is that I have to do a lot of copy/paste. Extract data from Toggl, import it into Excel, replace the invoice numbers, generate the PDF, export to Dropbox for safekeeping, etc.

So, I’ve decided to try to automate the most of those task for the lowest possible cost. My first step will be to extract the raw data for which I bill my clients.

If you are interested, you can find the solution on GitHub. The project name is TogglImporter.

Here’s the Program.cs

1
2
3
4
5
6
7
8
9
10
11
12
13
14
15
16
17
18
19
20
21
22
23
24
25
26
27
28
29
30
31
32
33
34
35
36
37
38
39
40
41
42
43
44
45
46
47
48
49
50
51
52
53
54
55
56
57
58
59
60
using System;
using System.Linq;
using System.Threading.Tasks;
using Microsoft.Extensions.Configuration;
using Microsoft.Extensions.PlatformAbstractions;

namespace TogglImporter
{
public class Program
{
public static void Main(string[] args)
{

Task.WaitAll(Run(args));
}

public static async Task Run(string [] args)
{

Console.WriteLine("Starting Toggl Import...");
var configuration = new ConfigurationBuilder()
.SetBasePath(PlatformServices.Default.Application.ApplicationBasePath)
.AddCommandLine(args)
.AddJsonFile("appsettings.json")
.AddJsonFile("appsettings.production.json", true)
.Build();


var queries = new Queries(configuration["togglApiKey"]);
var storage = new CloudStorage(configuration["storageAccount"], "toggl-rawdata");
Console.WriteLine("Initializing storage...");
await storage.InitializeAsync();

Console.WriteLine("Saving workspaces to storage...");
var workspaces = await queries.GetWorkspacesAsync();
var novawebWorkspace = workspaces.First(x => x.Name == "Novaweb");
await storage.SaveWorkspace(novawebWorkspace);
await Task.Delay(250);

Console.WriteLine("Saving clients to storage...");
var clients = await queries.GetWorkspaceClientsAsync(novawebWorkspace.Id);
await storage.SaveClients(clients);
await Task.Delay(250);

Console.WriteLine("Saving projects to storage...");
var projects = await queries.GetWorkspaceProjectsAsync(novawebWorkspace.Id);
await storage.SaveProjects(projects);
await Task.Delay(250);

Console.WriteLine("Saving time entries to storage...");
const int monthsToRetrieve = 2;
for (int monthsAgo = 0; monthsAgo > -monthsToRetrieve; monthsAgo--)
{
var timeEntries = await queries.GetAllTimeEntriesForXMonthsAgoAsync(monthsAgo);
await storage.SaveTimeEntriesAsync(DateTime.UtcNow.AddMonths(monthsAgo), timeEntries);
await Task.Delay(500);
}

Console.WriteLine("Toggl import completed.");
}
}
}

What’s happening?

First, I have an object called Queries that will take a Toggl API Key and will query their API. Simple HTTP Client requests that returns objects that are already deserialized.

Then I have an object called CloudStorage that will store those objects to specific area in the cloud. Those will enforce folder hierarchies and naming.

Finally, I delay after each request to ensure I’m not overloading their API. The last thing you want to do, is having them shut it all down.

What’s being exported?

I export my Workspace, Clients, Projects as well as every time entries available for the last 2 months. I do those in multiple requests because this specific API will limit the amount of entries to 1000 and does not support paging.

If any of this can be helpful, let me know in the comments.

Localizing Auth0 Single Sign-on text for Lock v9.2.2

In the current mandate, we are using Auth0 Lock UI v9.2.2.

There happen to be a bug with the widget where the following text is hardcoded.

Single Sign-on Enabled

To fix this issue in our AngularJS Single Page Application, we had to introduce this in the index.html file.

1
2
3
4
5
6
7
8
9
10
<style ng-if="myLanguage == '<LANG HERE>'">
.a0-sso-notice::before{
font-size: 10px;
content: '<YOUR TEXT HERE>';
}

.a0-sso-notice{
/* hack to hide the text */
font-size: 0px !important;
}

</style>

This piece of code fixes the issue when a specific language is specified. ng-if will completely remove the tag when the language won’t match and monkey patch the text.

If you have more than 2 languages, it would pay to consider injecting the text directly within the style tag. Since Angular doesn’t allow you to parse it, somebody else already documented how to do it.

Publishing an App Service linked WebJob through Azure Resource Manager and Visual Studio Team Services

Assumptions

I assume that you already have a workflow with Visual Studio Team Services that deploy your Web Application as an App Service.

I assume that you are also deploying with an Azure Resource Group project that will automatically provision your application.

Creating the WebJobs

Well… that part is easy. You right click on the application that will be hosting your WebJob and you select Add > New Azure WebJob Project.

New Azure WebJobProject

Once you click on it, you should see the following Wizard. At that point, you have a wide variety of choices on how and when to run your WebJob. Personally, I was looking for a way to run tasks on a schedule every hours forever.

You could have a Continous job that will respond to trigger, one time jobs, recurring jobs with and end date. It’s totally up to you at that point.

New Azure WebJobProject

Once you press OK, a new projet will be created and your Web App will have a new file named webjobs-list.json added under Properties. Let’s look at it.

1
2
3
4
5
6
7
8
{
"$schema": "http://schemastore.org/schemas/json/webjobs-list.json",
"WebJobs": [
{
"filePath": "../MyWebJob/MyWebJob.csproj"
}

]
}

That is the link between your WebApp and your WebJobs. This is what will tell the build process on VSTS that it also needs to package the WebJob with this website so that Azure can recognize that it has WebJobs to execute.

Configuring the WebJob

Scheduling

By default, you will have a webjob-publish-settings.json created for you. It will contain everything you need to run the task at the set interval.

However, the Program.cs should look like this for task that should be run on a schedule.

1
2
3
4
5
6
7
8
9
public class Program
{
static void Main()
{

var host = new JobHost();
host.Call(typeof(Functions).GetMethod("MyTaskToRun"));
//host.RunAndBlock();
}
}

If the RunAndBlock command is present, the process will be kept alive and the task won’t be able to start at the next scheduled run. So remove it.

As for the code itself, flag it with NoAutomaticTrigger.

1
2
3
4
5
6
7
8
public class Functions
{
[NoAutomaticTrigger]
public static void MyTaskToRun()
{

Console.WriteLine("Test test test");
}
}

Continuous

This is the perfect mode when you want to respond to events like new message being sent from the Queue.

In this scenario, ensure that you have RunAndBlock. This is a polling mechanism and if your WebJob isn’t running, it’s not running events.

1
2
3
4
5
6
7
8
public class Program
{
static void Main()
{

var host = new JobHost();
host.RunAndBlock();
}
}
1
2
3
4
5
6
7
public class Functions
{
public static void ProcessMessage([QueueTrigger("MyQueue")] string message, TextWriter log)
{

//TODO: process message
}
}

Enabling the Logs with your Storage Account through ARM templates

That’s the last part that needs to make sure your WebJob is running properly.

By default, they are running part in the same instance as your website. You need a way to configure your storage account within your ARM template. You really don’t want to hardcode your Storage account within your WebJob anyway.

So you just need to add this section under your WebApp definition to configure your connection strings properly.

1
2
3
4
5
6
7
8
9
10
11
12
13
14
15
16
17
18
19
20
21
{
"resources": [
{
"apiVersion": "2015-08-01",
"type": "config",
"name": "connectionstrings",
"dependsOn": [
"[concat('Microsoft.Web/Sites/', variables('myWebApp'))]"
],

"properties": {
"AzureWebJobsDashboard": {
"value": "[Concat('DefaultEndpointsProtocol=https;AccountName=',variables('MyStorageAccount'),';AccountKey=',listKeys(resourceId('Microsoft.Storage/storageAccounts', variables('MyStorageAccount')), providers('Microsoft.Storage', 'storageAccounts').apiVersions[0]).keys[0].value)]",
"type": "Custom"
}
,

"AzureWebJobsStorage": {
"value": "[Concat('DefaultEndpointsProtocol=https;AccountName=',variables('MyStorageAccount'),';AccountKey=',listKeys(resourceId('Microsoft.Storage/storageAccounts', variables('MyStorageAccount')), providers('Microsoft.Storage', 'storageAccounts').apiVersions[0]).keys[0].value)]",
"type": "Custom"
}

}

}]

}

Remove the X from Internet Explorer and Chrome input type search

When you have a some input with type="search", typing some content will display an X to allow you to clear the content of the box.

1
<input type="search" />

That X is not part of Bootstrap or any other CSS framework. It’s built-in the browser. To be more precise, Chrome and IE10+.

The only way to remove it is to apply something like this:

1
2
3
4
5
6
7
8
9
/* clears the 'X' from Internet Explorer */
input[type=search]::-ms-clear { display: none; width : 0; height: 0; }
input[type=search]::-ms-reveal { display: none; width : 0; height: 0; }

/* clears the 'X' from Chrome */
input[type="search"]::-webkit-search-decoration,
input[type="search"]::-webkit-search-cancel-button,
input[type="search"]::-webkit-search-results-button,
input[type="search"]::-webkit-search-results-decoration { display: none; }

The width/height on the Internet Explorer code is to ensure that no space is kept for the component. Otherwise, if you type text long enough, the content may be hidden under the hidden X.

That’s it. Copy/paste that in our main CSS file and all search box won’t have that annoying X anymore.

Shooting yourself in the foot with C# Tasks - ContinueWith

Accidentally swallowing exceptions with C# async ContinueWith() is a real possibility.

I’ve accidentally done the same recently on a project.

The idea was that once a method finished running, I wanted to execute a log of the task that was executed.

So my Controller Action looked something like this:

1
2
3
4
5
6
7
[HttpDelete]
public async Task<HttpResponseMessage> DeleteSomething(int id)
{

await _repository.DeleteSomething(id)
.ContinueWith(task => _log.Log(task));
return Request.CreateResponse(HttpStatusCode.OK);
}

The delete would go and run the query against the database and delete some records in Azure Table Storage.

The Log method would just read the object resulting from the task completing and finish.

What would happen when DeleteSomething throws an exception? ContinueWith would get passed the faulted Task and if you didn’t retrow at that point, it would go on and return an HTTP 200.

Wow. That’s bad. It’s like a highly sophisticated On Error Resume Next. Welcome to 1995.

Let’s fix this. I’m expecting to run this Task only when it succeed. So let’s make sure I use the right overload.

1
2
3
4
5
6
7
[HttpDelete]
public async Task<HttpResponseMessage> DeleteSomething(int id)
{

await _repository.DeleteSomething(id)
.ContinueWith(task => _log.Log(task), TaskContinuationOptions.OnlyOnRanToCompletion);
return Request.CreateResponse(HttpStatusCode.OK);
}

If I keep doing stupid stuff like this, I might turn this into a series of what NOT to do.

If you encountered something similar, please let me know in the comments!

Backup and restore your Atom installed packages

So you are using Atom and you start installing plugins. Everything works nice and you have your environment with just the right packages.

Suddenly, your hard drive crash or maybe your whole computer burn down. Or worse, you HAVE to use a client’s computer to do your work.

So you have to reconfigure your environment. How will you recover all your packages and preferences?

First, as soon as you have your packages in a good state, run the first command to backup your installed packages.

Backing up your Atom Packages

Run this command:

1
apm list --installed --bare > atomPackages.txt

Will output something like this:

1
[email protected]
[email protected]
[email protected]

Restoring your Atom Packages

To restore those packages, run the following command:

1
apm install --packages-file .\atomPackages.txt

Will give you an output like this:

1
Installing [email protected] to C:\Users\XXX\.atom\packages done

What’s apm?

apm stands for Atom Package Manager. See it as a something similar to npm for node but for the Atom editor instead. You can do pretty much anything you want to Atom with apm.

What’s left?

The only we are not backing up at this point is your snippets, custom styles, themes and your keymaps.

If you are interested, let me know and I’ll show you how to back those up too.

Protecting your ASP.NET Identity passwords with bcrypt and scrypt

Most people nowadays use sort of authentication mechanism when coding a new website. Some people are connected directly with Active Directory, others use Social login like Google, Facebook or Twitter.

Then there is all those enterprise/edge case customers that don’t have an SSO (or can’t have one) and still require users to create an account and pick a password.

In those scenarios, you don’t want to end up on Troy Hunt‘s infamous list of Have I been pwned?. If you do, you want the maximum amount of time so that you can change your password everywhere. We still do too much password reuse. It’s bad but it’s not going away anytime soon.

So how do you delay? First, do not store your password in clear text. Then, hash/salt them. But which hashing algorithm should you use?

Most of .NET (pre-core) suggested MD5/SHA1 as a default hashing mechanism which is highly unsafe. In .NET Core, the default implementation is PBKDF2 which is a hundred times better. However, unless you require FIPS certification, is not exactly safe either.

Slower algorithms

PBKDF2 is part of a family of algorithms that allow you to configure work factors at the moment of encoding the password. PBKDF2 allow you to set the amount of iterations that the hash must run before the hash is returned.

But given enough CPU/memory, this can be cracked faster each year.

There come bcrypt and scrypt.

BCrypt, like PBKDF2, allow you to set a work factor that will make the CPU run more heavily to generate a single hash. This makes brute forcing algorithms slower to run. However, with GPU hashing, those limitations are less and less of a restriction.

SCrypt on the other hand, allows you to set the memory usage. Making generating a lot of password a very memory and CPU intensive process. This makes GPU hashing way harder for that specific algorithm.

Which one do I choose?

If you need FIPS certification? PBKDF2. Otherwise, scrypt is the way to go.

PBKDF2 should be configured to at least 10,000 iterations. Scrypt should be configured so that a server is responsive enough for users to log in. That means less than a second to login. Many parameters are offered and will need to be tweaked to your current hardware.

Please not that I am not a mathematician and I can’t explain to you why one is better than the other. I’m just relaying what was suggested on OWASP - Password Storage Cheat Sheet.

How do I install those algorithm within ASP.NET Identity?

I have provided two different sample implementation for bcrypt and scrypt that will replace the default ASP.NET Core Identity IPasswordHasher.

I have also included the ASP.NET Core compatible package to use when you want to install this package.

BCrypt

1
Install-Package BCrypt.Net-Core

This package was created by Stephen Donaghy as a direct port of bcrypt. Source on GitHub.

Startup.cs:

1
2
3
4
5
public void ConfigureServices(IServiceCollection services)
{

// ...
services.AddTransient<IPasswordHasher<ApplicationUser>, BCryptPasswordHasher>();
}
1
2
3
4
5
6
7
8
9
10
11
12
13
14
15
16
17
18
19
20
public class BCryptPasswordHasher : IPasswordHasher<ApplicationUser>
{
public string HashPassword(ApplicationUser user, string password)
{
return BCrypt.Net.BCrypt.HashPassword(SaltPassword(user, password), 10);
}

public PasswordVerificationResult VerifyHashedPassword(ApplicationUser user, string hashedPassword, string providedPassword)
{
if (BCrypt.Net.BCrypt.Verify(SaltPassword(user, providedPassword), hashedPassword))
return PasswordVerificationResult.Success;

return PasswordVerificationResult.Failed;
}

private string SaltPassword(ApplicationUser user, string password)
{
//TODO: salt password
}
}

SCrypt

1
Install-Package Scrypt.NETCore

Startup.cs:

1
2
3
4
5
public void ConfigureServices(IServiceCollection services)
{

// ...
services.AddTransient<IPasswordHasher<ApplicationUser>, SCryptPasswordHasher>();
}
1
2
3
4
5
6
7
8
9
10
11
12
13
14
15
16
17
18
19
20
21
22
23
24
25
26
27
public class SCryptPasswordHasher : IPasswordHasher<ApplicationUser>
{
private readonly ScryptEncoder _encoder;

public SCryptPasswordHasher()
{
_encoder = new ScryptEncoder(2 ^ 16, 8, 1);
}

public string HashPassword(ApplicationUser user, string password)
{
return _encoder.Encode(SaltPassword(user, password));
}

public PasswordVerificationResult VerifyHashedPassword(ApplicationUser user, string hashedPassword, string providedPassword)
{
if (_encoder.Compare(SaltPassword(user, providedPassword), hashedPassword))
return PasswordVerificationResult.Success;

return PasswordVerificationResult.Failed;
}

private string SaltPassword(ApplicationUser user, string password)
{
//TODO: salt password
}
}

More reading

Read more on :

Increasing your website security on IIS with HTTP headers

UPDATE

And within 5 minutes of this post being published, Niall Merrigan just threw a wrench in my wheels.

All of the following can easily be applied by simply installing NWebSec written by André N. Klingsheim. Checkout the Getting Started page to install it right now.

However, if you are not running the ASP.NET Pipeline (old or new), those recommendation still applies.

If you guys are aware of any library that can replace applying those manually, please let me know and I’ll update this post.

HTTP Strict Transport Security (HSTS)

What is it?

HSTS is a policy integrated within your browser that ensure that no protocol downgrade happens.

That means going from HTTPS > HTTP or in the case where the certificate is not valid, disallowing the page to load all together.

So let’s say I type http://www.securewebsite.com in my address bar, the browser will automatically replace http:// by https://.

Let’s say now that the certificate was replaced by a man in the middle attack, it will simply show an error page without allowing you to skip that page.

How do I implement it?

This consist in sending the header Strict-Transport-Security with a max-age value in seconds.

This would enforce the policy for 1 year, will force all subdomains to be HTTPS and enable you to be on the preloaded list:

Strict-Transport-Security: max-age=31536000; includeSubdomains; preload

NOTE: Be careful about the preload list. Once you are on it, you are going to be there for a long time. There would be no expiry. If that preload flag is present, anyone can submit your domain to be on the list. It will not be added automatically, but once it’s done… you’re in. It may take months to be taken off. Read here for more details about removal.

With IIS and its web.config, we force HTTPS urls and we automatically flag the request with the right header.

1
2
3
4
5
6
7
8
9
10
11
12
13
14
15
16
17
18
19
20
21
22
23
24
25
26
27
<?xml version="1.0" encoding="UTF-8"?>
<configuration>
<system.webServer>
<rewrite>
<rules>
<rule name="HTTP to HTTPS redirect" stopProcessing="true">
<match url="(.*)" />
<conditions>
<add input="{HTTPS}" pattern="off" ignoreCase="true" />
</conditions>
<action type="Redirect" url="https://{HTTP_HOST}/{R:1}"
redirectType="Permanent" />

</rule>
</rules>
<outboundRules>
<rule name="Add Strict-Transport-Security when HTTPS" enabled="true">
<match serverVariable="RESPONSE_Strict_Transport_Security"
pattern=".*" />

<conditions>
<add input="{HTTPS}" pattern="on" ignoreCase="true" />
</conditions>
<action type="Rewrite" value="max-age=31536000; includeSubdomains" />
</rule>
</outboundRules>
</rewrite>
</system.webServer>
</configuration>

Limits

I could talk about the limits but Troy Hunt does an infinitely better job of explaining it than I do.

Also, please be aware that all latest versions of any modern browsers support this. However, IE10 and less will not protect you from these types of attacks.

IE11 and edge are implementing this security feature.

X-Frame-Options

What a user is trying to display your website within an iframe? Most of the time, this is not a desired nor a tested scenario. At worse, it’s just another attack vector.

Let’s block it.

What is it?

X-Frame-Options allow you to set whether a domain is allowed or not to display your content within an iframe. Since nobody uses this technology today, we can either disable it or restrict it to the same domain as the requesting site.

It protects you from attacks called clickjacking.

How do I implement it?

1
X-Frame-Options: [deny|sameorigin]

If you are using IIS, you can simply include this in its configuration.

1
2
3
4
5
6
7
8
9
10
<?xml version="1.0" encoding="UTF-8"?>
<configuration>
<system.webServer>
<httpProtocol>
<customHeaders>
<add name="X-Frame-Options" value="DENY" />
</customHeaders>
</httpProtocol>
</system.webServer>
</configuration>

Please note that deny will simply disallow any iframe from being used whether they come from your site, a subdomain or anywhere. If you want to allow same origin iframes, you have to replace DENY by sameorigin.

X-XSS-Protection

Certain browsers have a security mechanism that detects when a XSS attack) is trying to take place.

When that happens, we want the page to be blocked and to not sanitize the content.

What is it?

This is a security feature that was first built within IE8. It was then brought into all Webkit browsers (Chrome & Safari). Each have their own criteria about what is an XSS attack but each will use that header to activate/deactivate/configure that option.

How do I implement it?

1
X-XSS-Protection: 1; mode=block

If you are using IIS, you can simply include this in its configuration.

1
2
3
4
5
6
7
8
9
10
<?xml version="1.0" encoding="UTF-8"?>
<configuration>
<system.webServer>
<httpProtocol>
<customHeaders>
<add name="X-XSS-Protection" value="1; mode=block" />
</customHeaders>
</httpProtocol>
</system.webServer>
</configuration>

Content-Security-Policy

Let’s say I’m using a library in my project. This sprint, we update this library to the latest version, test it and everything seems to work. We push it to production and bam. Suddenly, our users are being compromised. What you didn’t know is that plugin was compromised a month ago. It loaded an external script and ran its script like it was coming from your own website.

What is it?

This header prevents most Cross Site Scripting attacks by controlling from where script, css, plugins, etc. can actually be run from.

How do I implement it?

This one requires careful tweaking. There is literally tons of options to define it.

The most basic setting you can do is this:

1
Content-Security-Policy: script-src 'self;'

This will restrict all JavaScript files to only come from your own domain. If you are using Google Analytics, you would need to add that domain. Like so:

1
Content-Security-Policy: script-src 'self www.google-analytics.com ajax.googleapis.com;'

A good default to start with?

1
Content-Security-Policy: default-src 'none'; script-src 'self'; connect-src 'self'; img-src 'self'; style-src 'self';

From that point, test your site with the console open. Check which domains are being blocked, and white list them. You will see messages like these in the console:

Refused to load the script ‘http://…’ because it violates the following Content Security Policy directive: “…”.

As always, here’s the IIS version to implement it with the .config file.

1
2
3
4
5
6
7
8
9
10
<?xml version="1.0" encoding="UTF-8"?>
<configuration>
<system.webServer>
<httpProtocol>
<customHeaders>
<add name="Content-Security-Policy" value="default-src 'none'; script-src 'self'; connect-src 'self'; img-src 'self'; style-src 'self';" />
</customHeaders>
</httpProtocol>
</system.webServer>
</configuration>

Cross Platform PDF generation with ASP.NET Core and PhantomJS

That post will be short but it’s worth it. One of the easiest way I found to statically generate reports from .NET Core is to simply not to use ASP.NET Core for rendering PDF.

At the current state of affair, most libraries aren’t up to date and may take a bit of time before they are ready to go. So how do you generate PDF without involving other Nuget packages?

PhantomJS

What to render with ASP.NET Core?

Let’s take an example like invoices. I could create an internal-only MVC website that have only one unsecure controller that renders invoices in HMTL on specific URLs like /Invoice/INV000001.

Once you can render one invoice per page, you have 99% of the work done. What remains is to generate the PDF from that HTML.

How does it work with PhantomJS

By using scripts like rasterize.js to interface with phantomjs, you can easily create PDF files in no time.

1
phantomjs rasterize.js http://localhost:5000/Invoice/INV000001 INV000001.pdf

And that’s it. You now have a PDF. The only thing left is to generate the list of URLs and associated filenames for the invoices you want to generate and run that list against that script.

It could even be part of an generation flow where a message could be put on a queue to generate those invoice asynchronously.

1
2
3
4
{
'invoiceId': 'INV000001',
'filename': 'INV000001.pdf'
}

From there, we could have a swarm of processes that just runs the phantomjs script and generate the proper invoice at the proper destination like a blob storage.

Cross-Platform concerns

The best part about this process is that PhantomJS is available on Linux, OSX as well as Windows. With ASP.NET Core also being available on all these platforms, you currently have a cross-platform solution that will meet most of your requirements in term of cross-platform needs.

Even better, this scenario works very well on Azure. By opting for an asynchronous flow, we allow our operation to scale better and allow ourselves to slice our operations to a more maintainable size.

If you have opinion on the matter, please leave a comment!

Snippets: Atom Edition

To continue on my previous post about Visual Studio Snippets, I thought it might be nice to also do Atom.

First, to open your snippets go in File > Snippets....

Atom Snippet Menu Location

This will open up a CSON file.

CSON File format

Think of it as JSON but with comments and instead of using angular brackets, it uses indentation to define sub-elements.

Another thing that is very important to note, single ' or double " don’t matter.

Finally, is you want to do multi-lines snippet (very useful!), you’ll need to triple those quotes.

Here’s a sample valid CSON

1
2
3
4
5
6
7
8
9
10
'rootObject':
'child object':
"another something": "value of thing"
'property': '''
multiple line property
'''

"anotherMultilineProperty": """
Having lots of fun
over here
"""

So? Familiar with the format?

Let’s create our first snippet.

First snippet

So let’s start with creating a snippet for a basic text file.

1
2
3
4
'.text.plain': # Scope of the snippet
'Title of my snippet': # Title
'prefix': 'copyright' # What text will trigger the snippet
'body': '© Novaweb Solutions' # Content of the snippet

Same thing but with multi-lines support:

1
2
3
4
5
6
7
'.text.plain': # Scope of the snippet
'Title of my snippet': # Title
'prefix': 'copyright' # What text will trigger the snippet
'body': '''
Other legalese here?
© Novaweb Solutions
'''

Wow. That was easy. But what about other file-type?

Scopes

Atom have a more stylish way of scoping snippets that works across languages and filetypes. Including support for files that are included by installing packages.

Those are scope. When a file is parsed, it will be tokenized and scopes will be added depending on your cursor location.

Every file has a scope that is global. The default one is text.plain (translated to .text.plain for CSON purposes).

So let’s say I have this JavaScript file and I want to know what it’s scope is.

If you open the file and run the command Editor: Log Cursor Scope (CTRL-ALT-SHIFT-P), a popup will show you the current scope.

Atom JavaScript Scope

Now, you just need to replace .text.plain by .source.js and your snippet will be active for that file type.

If you want to have a snippet active for all source code files, you could also use .source.

Variables in templates

Well, there is no real variables. You can however tokenize areas where you will be prompted for value.

Let’s take our previous template and tokenize it!

1
2
3
4
'.text.plain': # Scope of the snippet
'Title of my snippet': # Title
'prefix': 'copyright' # What text will trigger the snippet
'body': '© ${1: Company Name}' # Content of the snippet

Just remember that you can’t have more than one scope present at the same time in your CSON file. All other snippets must go under that scope.

Snippets is just one of the many ways to avoid retyping the same code over and over. If you are interested, share your favorite snippet in the comments bellow!

Snippets: Visual Studio Edition

While I do presentation, I’m always trying to type as few lines of code as possible.

That doesn’t mean I don’t want live running code on the screen however. I just don’t want people seeing me fight with an API. So I do write some code in advance, figure out the right API and test it to make sure it does what I want it to do.

When it’s time to present it to the public, I just have to copy/paste my code in.

But there’s a better way than just copy/pasting and it’s called snippets.

In this specific post, I will cover Visual Studio.

Visual Studio Snippet Manager

So you are using Visual Studio and you want to create snippets.

First, Visual Studio ships with tons of snippets but no snippet editor. You can add/remove/import but there’s no visual aid for you. So let’s cover this first.

First, we have to open the snippet manager.

Snippet Manager Menu Location

From that point, you’ll be able to see all the supported languages as well as all related snippets.

Snippet Manager

If you click on a specific snippet, you’ll see where it is located. If you open that file in Notepad (or any XML editor), you’ll get something like this:

1
2
3
4
5
6
7
8
9
10
11
12
13
14
15
16
17
18
19
20
21
22
23
24
25
<CodeSnippet Format="1.1.0" xmlns="http://schemas.microsoft.com/VisualStudio/2005/CodeSnippet">
<Header>
<Title>checkbox</Title>
<Author>Meh</Author>
<Description>None</Description>
<Shortcut>checkbox</Shortcut> <!-- <=== this Allows you to use auto-complete -->
<AlternativeShortcuts>
<Shortcut Value="checkbox">asp:checkbox</Shortcut> <!-- alternative to the first shortcut that is defined -->
</AlternativeShortcuts>
<SnippetTypes>
<!-- Expansion: insert at cursor and replace the typed "shortcut" -->
<!-- SurroundsWith: If inserted while a piece of code is selected, it will surround the selection -->
<SnippetType>Expansion</SnippetType>
</SnippetTypes>
</Header>
<Snippet>
<Declarations> <!-- Here, you declare your variables that are going to be used in your snippet. -->
<Literal>
<ID>text</ID> <!-- Variable ID -->
<Default>text</Default> <!-- Variable default value when inserting -->
</Literal>
</Declarations>
<Code Language="html"><![CDATA[<asp:checkbox text="$text$" runat="server" />$end$]]></Code>
</Snippet>
</CodeSnippet>

I’ve removed everything that is optional. I’ve only kept what is necessary to have this template functional for simplicity’s sake. I’ve also added comments to allow you to get a better understanding of what is going on.

The code element is where you will insert your code. Everything needs to be wrapped inside a <![CDATA[ ... ]]. This will allow you to insert carriage return, XML or any other types of data.

If you find yourself stumped on certain snippets, check out what was already done in Visual Studio. You might find inspiration!

For more documentation on the different elements, check the Code Snippets Schema Reference.

TypeScript or good old JavaScript?

Should I use TypeScript instead of pure JavaScript?

With Angular 2 right around the corner and TypeScript 2.0 beta just being released, a lot of questions are being asked. Should I keep on coding in JavaScript or should I give TypeScript a try?

If you aren’t on TypeScript yet, it’s basically a superset of JavaScript. All JavaScript is TypeScript but TypeScript isn’t valid JavaScript. Follow me?

Why TypeScript?

So what does TypeScript bring to the table?

  • Static Typing (classes + interfaces)
  • Funcitons
  • Lambdas
  • Namespaces
  • Modules
  • Enum
  • etc.

This allow IDE to implement static typing, validation and better code management (namespaces, modules, etc.).

Of course, another valid option is to go ES6 and just babel your code. However, I like the idea of introducing a new language. It breaks the chains and expectations that are brought from JavaScript.

Gulp Pipeline

With standard JavaScript development, I normally need to JSHint, concat, uglify and jasmine my code (translation: lint, bundle, minify and unit test). In my standard gulp workflow, that means I have to use jshint, gulp-concat, uglify as well as jasmine to have everything running smoothly.

With TypeScript, you can basically take out jshint out the window unless you want to lint your .ts files too.

So what does my gulp pipeline looks like?

  1. rimraf
  2. concat my files together
  3. Run JSHint
  4. uglify my file
  5. Output to disk
  6. Run my tests

With TypeScript, it look like:

  1. rimraf
  2. concat my files together (handled by the TypeScript compiler)
  3. Run JSHint Run TypeScript compiler (no need to run JSHint on compiled code.)
  4. uglify my file
  5. Output to disk
  6. Run my tests

The most basic of gulp task that compiles your TypeScript files is something like this:

1
2
3
4
5
6
7
8
9
10
11
var gulp = require('gulp');
var ts = require('gulp-typescript');

gulp.task('default', function () {
return gulp.src('src/**/*.ts')
.pipe(ts({
noImplicitAny: true,
out: 'output.js'
}))
.pipe(gulp.dest('built/local'));
});

What should I do?

You should try it. Try to setup your workflow with TypeScript (which should be pretty easy).

Start with compiling your standard JavaScript code against TypeScript then try to move to creating .ts files.

Like my frameworks or languages in this world, you can’t say you don’t like it if you haven’t tried it.

If you want to try it, here’s how to install it.

IDE Support

Visual Studio & VS Code

TypeScript is automatically installed with the lastest web tools. If you are doing ASP.NET MVC, you already have the tools installed.

Atom

To enable TypeScript support in Atom run the following:

1
apm install atom-typescript

Sublime

With Package Control, install the TypeScript package.

For additional info on how to install TypeScript on Sublime, check out the installation instructions.

Debugging the web with Chrome

There are so many ways to do web development today. But the most common scenario you are going to encounter, is debugging a web page.

Whether you are in jQuery or AngularJS, at some point you will need to display a variable’s value or break somewhere that is hard to reach. The best tool for me to debug a web page is Google Chrome but some of those tricks might work in other browsers.

So let me show you my favorite, yet less known, tricks about debugging web pages.

console.table

Have you ever had an array with lots of rows and start expanding the values looking for a specific object?

Google Chrome Array

Well there is a better way.

Google Chrome console.table(...)

If you only want certain properties you can even pass in the fields you want.

1
console.table(array, ["name", "age"])

So stop expanding your objects one by one and use console.table to view them all at once.

debugger

1
2
3
4
function myFunction() {
// do stuff
debugger;
}

This one is easy. If the developer console is opened, your browser will break on the debugger line as soon as it reach it. Of course, be aware that you cannot disable this breakpoint.

DOM elements in the console

Have you ever displayed a DOM element in the console?

DOM element in console

But what if you want to see the actual JavaScript properties of the DOM element? console.dir(...) is your friend.

console.dir

console.dir force the JavaScript representation of any object that you are trying to display.

Profiling your code

Sometimes, code runs slowly. Profiling with Chrome is extremely easy. You click start, you run your piece of code and you press stop. Easy right?

But that will record anything that happens at that moment. What if the problematic code is located in a specific execution path in you want to just profile this part? I have the solution for you.

1
2
3
4
5
function (){
console.profile("Slow Code");
slowFunction();
console.profileEnd("Slow Code");
}

Running this type of code will give you this output in your Profile tabs in Chrome Developer tools.

Google Chrome Profiling Session

Debugging devices

You are probably developing on a desktop (or laptop) with a large display resolution. However, mobile is also an important focus for your organization when developing web apps.
How do you test multiple resolutions? Different media queries?

Most people resize their browsers. Let me show you a better way.

First activate the device toolbar by clicking here.

Device Toolbar Button

You will then see this bar at the top.

Device Toolbar Expanded.

Do you see the three dots on the right? Click on it.

Device Toolbar Option

From there, you can activate media queries, rulers, media queries and really boost what you can do with Chrome.

Need to test specfici media queries? Yep. Need to test your website on a GPRS connection? 2 clicks away. Resize your viewport? Easy!

Wrapping it up

Of course, there is so many more things that can be done with Chrome that I could talk about but I decided to focus on those that I used the most.

I will however leave some links that will allow you to explore more options!

Using Static Content Generation in ASP.NET Core

There are not a lot of tool in ASP.NET that allows you to generate static content on a site. The only good one out there is Wyam written by Dave Glick.

Others are excellent but they have the problem of running on NodeJS. While I don’t have a problem with node, lots of other .NET developers do. Most of them don’t write JavaScript for a living and would just like to use the latest tech to get things done.

So I came up with a proof of concept.

What I want to do?

I want to be able to create static files for a website without having to run the ASP.NET MVC pipeline every time. I’m talking here about content that doesn’t change very much.

From there, we’ll ensure that ASP.NET Core can serve those static files without having to resort to running MVC.

Can it be done? Have I gone mad? The answer is yes.

ASP.NET Core Architecture

The architecture of ASP.NET Core allow us to be at any time, part of the pipeline of the content generation.

One of this piece of this architecture is a Middleware. What’s a middleware? It’s an element of a pipeline that is ran before and after the actual user code. Elements of a pipeline are executed in order and call the next one in the pipeline. This allow us to run pre/post within the same class.

The theory here is, if we are high enough in the pipeline, we can intercept calls after they reach ASP.NET MVC to generate our files but low enough so that Kestrel can still serve our static files.

Startup.cs

First, we need to ensure that we set our Startup.cs properly. The first middleware are going to check for the default files. If they are found, they will stop the pipeline and just serve the file. If they are not found, they will get our middleware and finally MVC.

1
2
3
4
5
6
7
8
9
10
11
12
app.UseDefaultFiles(); // <== this is not present by default. Add it.
app.UseStaticFiles();

// ********* This is where we want to be ********
app.UseMiddleware<StaticGeneratorMiddleware>(); // <=== we'll create this middleware in a minute

app.UseMvc(routes =>
{
routes.MapRoute(
name: "default",
template: "{controller=Home}/{action=Index}/{id?}");
});

Here’s how it would look like visually.

Middleware execution order

As the request comes in, each middleware is executed in order and once the bottom of the pipeline is reached, each middleware gets to execute one last time on the way up.

Creating StaticGeneratorMiddleware

1
2
3
4
5
6
7
8
9
10
11
12
13
14
15
16
17
18
19
20
21
22
23
24
25
26
27
28
29
30
31
32
33
34
35
36
37
38
39
40
41
42
43
44
45
46
47
48
49
50
51
52
53
54
55
56
57
58
59
60
61
62
63
64
65
66
67
68
69
70
71
72
73
74
75
76
77
78
79
public class StaticGeneratorMiddleware
{
private readonly RequestDelegate _next;
private readonly IHostingEnvironment _hostingEnvironment;

public StaticGeneratorMiddleware(RequestDelegate next, IHostingEnvironment hostingEnvironment)
{

if (next == null) throw new ArgumentNullException(nameof(next));
if (hostingEnvironment == null) throw new ArgumentNullException(nameof(hostingEnvironment));

_next = next;
_hostingEnvironment = hostingEnvironment;
}

public async Task Invoke(HttpContext context)
{

if (context == null) throw new ArgumentNullException(nameof(context));
if (context.Request == null) throw new ArgumentNullException(nameof(context.Request));

// we skip non-html content for now


// we skip the first slash and we reverse the slashes
var baseUrl = context.Request.Path.Value.Substring(1).Replace("/", "\\");
// default files will look for "index.html"
var destinationFile = Path.Combine(_hostingEnvironment.ContentRootPath, "staticgen", baseUrl, "index.html");


// replace the output stream to collect the result
var responseStream = context.Response.Body;
var buffer = new MemoryStream();
var reader = new StreamReader(buffer);
context.Response.Body = buffer;
try
{
// execute the rest of the pipeline
await _next(context);

if (context.Response?.ContentType?.Contains("text/html") == false && context.Response.StatusCode != 200)
{
await _next(context);
return;
}

EnsureDestinationFolderExist(destinationFile);

// reset the buffer and retrieve the content
buffer.Seek(0, SeekOrigin.Begin);
var responseBody = await reader.ReadToEndAsync();

// output the content to disk
await WriteBodyToDisk(responseBody, destinationFile);

// copy back our buffer to the response stream
buffer.Seek(0, SeekOrigin.Begin);
await buffer.CopyToAsync(responseStream);
}
finally
{
// Workaround for https://github.com/aspnet/KestrelHttpServer/issues/940
context.Response.Body = responseStream;
}
}

private void EnsureDestinationFolderExist(string destinationFile)
{

var directoryName = Path.GetDirectoryName(destinationFile);
Directory.CreateDirectory(directoryName);
}

private async Task WriteBodyToDisk(string responseBody, string destinationFile)
{

using (FileStream fs = new FileStream(destinationFile, FileMode.Create))
using (StreamWriter sw = new StreamWriter(fs))
{
await sw.WriteAsync(responseBody);
}
}
}

What does it do?

It will create a folder hierarchy under your wwwroot folder and create index.html files that match the request URL.

Once the file exist, other request on the same URL will find the index.html that was created and skip the whole pipeline.

Pushing it further?

If we want to go mad scientist here, we could create a crawler that would access the urls on our site or maybe even generate a sitemap and loop on those urls.

What would happen is that everything that was served as HTML by MVC would be located in our wwwroot folder. We could then technically take this folder and just put it on any web server nad it would host your web site.

Pushing it to the cloud

Another step we could take is instead of outputting to disk, we would output to Azure Blob Storage. Immediately, you could spawn any instances of websites and none would access MVC unless the blob storage didn’t already exist.

Revoking files

Another middleware that should be added above UseDefaultFiles and UseStaticFiles is a middleware that would delete files after certain conditions. Otherwise, we will never regerate those files.

Creating files in a separate folder

First, you’ll need to update your UseStaticFiles to look like this:

1
2
3
4
5
6
7
app.UseStaticFiles(new StaticFileOptions
{
FileProvider = new CompositeFileProvider(
new PhysicalFileProvider(env.WebRootPath),
new PhysicalFileProvider(Path.Combine(env.ContentRootPath, "staticgen"))
)
});

Then, you will need to adapt the middleware to generate it in the proper directory.

1
var destinationFile = Path.Combine(_hostingEnvironment.ContentRootPath, "staticgen", baseUrl, "index.html");

Conclusion

With a simple middleware, we can generate static content directly from ASP.NET Core and allow it to be served locally without any other plugins.

Is there easier way to go static with ASP.NET Core? Probably.

Am I still mad? Yep and I stand by my crazy code.

Opt-in and enabling Attribute Routing in MVC 5

It happens to the best of us. You are building a new Web API and suddenly, you need an extra routing for a specific method.

First thing that comes into your head? Attribute Routing. Quick and easy solution for this small problem that just popped.

So you write something along those line:

1
2
3
4
5
6
7
8
public class ProductController
{
[Route("product/{productId:int}/details")]
public async Task<HttpResponseMessage> GetProductDetails(int productId)
{

// some code here
}
}

Then you go and test your route and you get a 404. It doesn’t work. You try different calls, different variation and before you know it… you’ve spent 15 minutes on the problem.

Why did it fail?

Enabling Attribute Routing

Attribute Routing is opt-in. You need to enable it in your Startup.cs before you can start using it.

1
config.MapHttpAttributeRoutes();

If this line is missing, any attribute routing that are defined will simply be ignored by the framework.

About Opt-In

Many things that were enabled by default are now going to be opt-in at different level. It makes the framework leaner if it doesn’t have to go and look for those attribute to start with. In fact, any option in the framework that is opt-in is just another path it doesn’t have to evaluate.

It confuse me sometimes that we need to enable things as basic as this but on the other hand, I’m happy.

A framework should not have everything turned on by default. It should allow you to include what you want while pre-activating some sensible defaults that can be turned off in case of need.

ASP.NET MVC is just doing an excellent job at allowing you to customize what you want and what you don’t.

Are we too used to having everything enabled by default? What are your toughts on the matter?

Client side filtering with angularjs

I always forget how to handle lists in Angular. So for my own sake and the benefit of my brain, I’ll write it down here so that I have a chance to memorize it properly.

We always have arrays and we often want them in arrays. So let’s start with the easy stuff.

Note

Client filtering shouldn’t be done with large dataset. Keep those on the server and filter it there. More performant for the user and less amount of data transferred to the user.

Rendering a table from an array

Let’s start with a simple example of an array being rendered into a table.

If I have a few items, that’s perfect. But what if items can be an array of 100 items?

1
2
3
4
5
6
<table>
<thead>...</thead>
<tbody>
<tr ng-repeat="item in items">...</tr>
</tbody>
</table>

Now, how do we filter this list to make it less massive for a user to look at.

Creating a custom list filter

In Angular, it’s quite easy to do. You just create a function in your $scope and invoke it with the filter filter. There’s other ways to use the filter but I’d rather keep my code in my code.

1
<tr ng-repeat="item in items | filter: ItemFilter"></tr>

The function will expect value, index and array in their parameters.

1
2
3
function ItemFilter(value, index, array){
return value.isEnabled;
}

In our scenario, it would display all enabled items. But what if, our list need to be restricted to fewer elements?

Limiting the amount of element in a list

There again, there’s a filter for that! The limitTo filter will take the X elements from your array. If the number is positive, it will be from the start of the array. If it’s negative, it will be from the end of the array.

1
<tr ng-repeat="item in items | filter: ItemFilter | limitTo: 10"></tr>

That’s it.

Now I’m just hoping that doing client side filtering in Angular will stick in my brain for just long enough for Angular2 to wipe it all away.