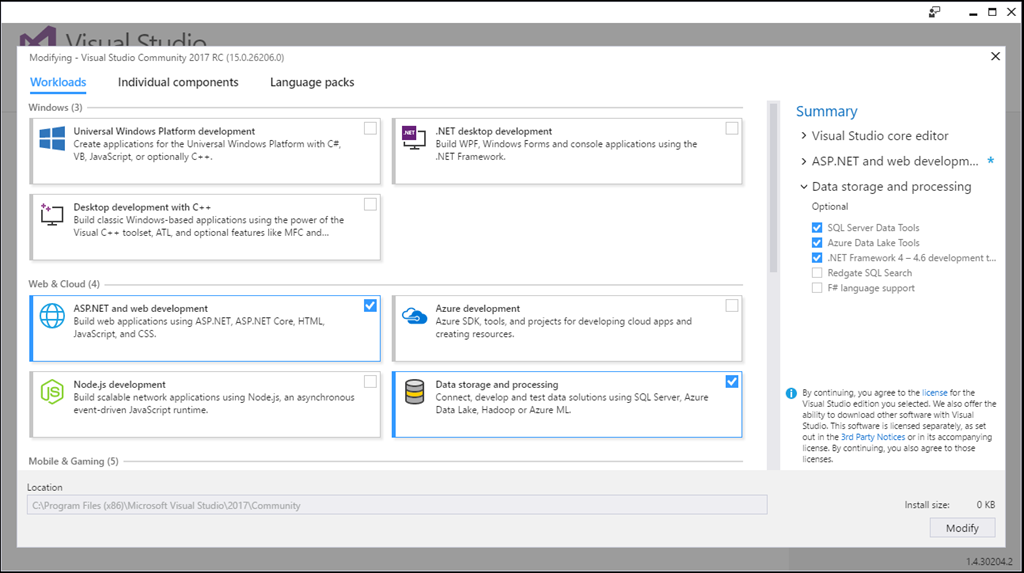
When installing Visual Studio in the past, you would be faced with a wall of Checkboxes that would leave wondering what you needed for what.
Introducing Workloads

Workloads are an easy way to select what kind of work you are going to do with Visual Studio. .NET Desktop development? Windows Phone? Web? All are covered.
If you look at that screenshot, you can see something new in there that wasn’t included previously. Azure. No more looking around for that Web Platform Installer to install the proper SDK for you.
You can access it directly from the installer. But what happens once you’re done and you want to modify your workloads?
If you start working on Visual Studio extensions, you need to be able to install that too.
Access the Installer after installation
There is two ways.
The first is to just press your Windows key and type Visual Studio Installer. Once the window is opened, you click the little hamburger menu and click modify.
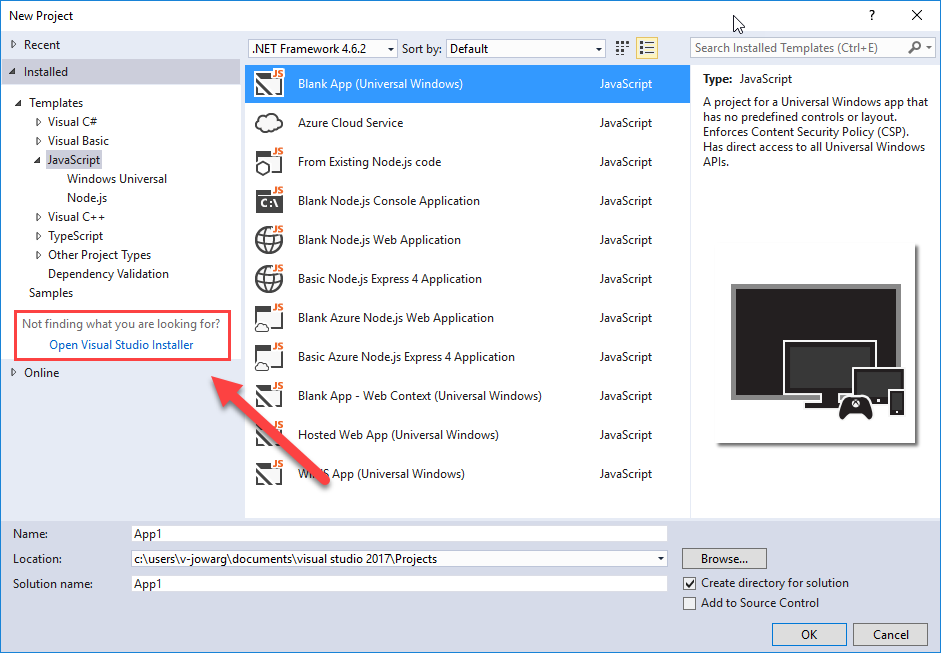
The second is to access it through the File > New Project... menu.

By clicking this link, the installer will open for you without having to go through the hamburger menu. Just pick your features.
Does that matter for you?
How do you like the new installer? Is it more user friendly than what was before?
What else could be improved? Let me know in the comments.